How to Fix Your file history drive was disconnected for too long? Whenever it comes to recovering files on a Windows Computer, you have several options. One of them is the File History utility, which allows you to backup files to an external hard drive.
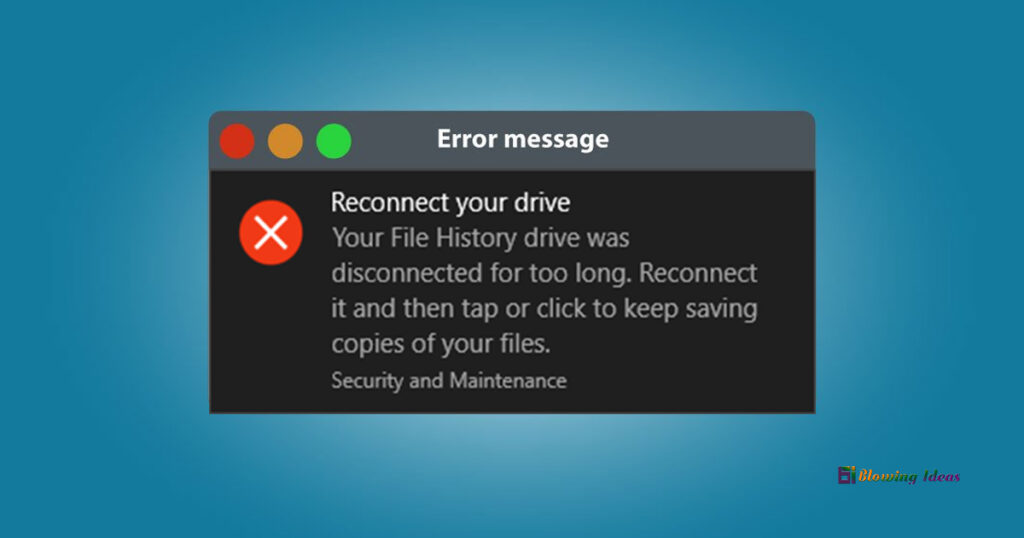
Your file history drive was disconnected for too long
It is critical to keep your critical data backed up and up to date at all times. You may quickly create backups of your files in Windows 11, 10, 8.1, and 8 thanks to File History. However, you may discover that your File History drive has become unplugged. The specific error message could look like this:
When your backup drive does not connect successfully or something goes wrong, the scheduled backup activity will prompt you with this notice. File History saves copies of files every hour by default, which can be pretty bothersome if you do not fix it, not to mention that your data are not safeguarded as intended.

The only issue with this utility is that it frequently displays error warnings such as “Your File History drive was disconnected for an inordinate amount of time.” Such concerns, however, should not prevent you from restoring your data. In this article, we’ll look at how to get your File History tool back up and running. Your file history drive was disconnected for too long.
What is the Windows File History Tool?
Before we go into how to fix the “Your File History drive was disconnected for too long” error, let’s first define File History and why it causes problems.
File History is a file recovery utility for Windows that saves versions of your files to an external hard drive. It searches your system on a regular basis and saves any changes to the files on your external storage. This reduces the possibility of losing all of your data if the system fails.
You can also restore multiple versions of your files using File History. If you want to restore an older file version, for example, you can navigate through a timeline, select the file version, as well as restore it.
Why is File History Giving You Issues?
If you’re wondering why the File History feature isn’t working properly, here are some possible causes:
- You may have disconnected your external hard drive, as suggested by the error notice. In this instance, File History will be unable to backup your files to an external hard drive.
- The backup drive or some of your computer’s files have become corrupted.
- You’ve made changes to the backup drive, therefore File History no longer recognises it.
List of 7 Methods to Fix Your file history drive was disconnected for too long
Let’s now look at how to repair the File History tool.
Method #1: Reconnect the Backup Drive
If you’ve determined that your external drive is disconnected, reattach it and repeat File History. Your computer should recognise the drive and resume the backup process automatically. If the problem persists, you may need to repair the drive.
Method #2: Enable File History
Whereas if the File History feature was inactive for an extended length of time, you can encounter this problem. In this instance, connecting your external drive and attempting to recover your files will fail.
To fix this problem, enable File History and make sure it is periodically backing up your files.
To activate File History, follow these steps:
- Go to the Windows Start menu and select PC Settings > Update & Security > Backup.
- Under the Back up using File History option, click the Add a drive button.
- In the following window, select the proper drive.
- Finally, in the Backup Options window, enable the Automatically backup my files checkbox.
Method #3: Delete File History AppData
Deleting File History AppData may assist in resolving this issue. But first, make sure your computer is set to show hidden files and directories.
This is how you do it:
- To open File Explorer, press Win + E.
- Select the Change folder and search options from the Options drop-down menu in the top-left corner of the screen.
- Navigate to the View tab in the next window and tick the Show hidden files, folders, & drives option. Lastly, click Apply but then OK to save your changes.
Secondly, delete the AppData folder by performing the following steps:
- To launch the Run command dialogue box, press Win + R.
- Enter AppData into the search box.
- Then, go to Local > Microsoft > Windows.
- Delete the File History folder by right-clicking it.
Method #4: Repair the Connected Backup Drive
Even if you’ve attached the correct external disc, File History might occasionally cause problems. In this instance, fixing the external drive may be beneficial.
Here’s how to fix your hard drive:
- To launch the Run command dialogue box, press Win + R.
- To open an elevated Command Prompt, type CMD and hit Ctrl + Shift + Enter.
- Replace the drive letter command with the actual drive letter name in the following command:
chkdsk drive_letter:/f- For example, if the name of your external drive is Local Disk (F:), your command should be:
chkdsk F:/f- When the process is finished, press Enter and restart your computer.
Alternatively, try activating File History through the Control Panel by doing the following steps:
- In the Windows search bar, type Control Panel and select the Best match.
- Select Small icons from the View by drop-down menu.
- Then, from the Control Panel menu, select File History.
- Enable File History in the next window by clicking the Turn on button.
- To complete the process, follow the on-screen directions.
- When you’re finished, exit the Control Panel and restart your computer.
Method #5: Change Your File History Backup Drive
This problem may be resolved by restoring your files to a separate drive. This is how you do it:
- In the Windows search bar, type Control Panel & select the Best match.
- Select Small icons from the View by drop-down menu.
- Choose File History from the Control Panel menu.
- Next, select your favourite drive by clicking the Select drive option and then pressing OK.
Method #6: Add A New Network Drive
If File History does not work on your external drive, consider backing up to a network drive instead.
Here’s how you do it:
- Make a folder on a network drive called File History Drive.
- Right-click the folder and choose Properties.
- Go to the Sharing tab and press the Share button.
- Click the drop-down arrow in the next window, choose Everyone, and then click the Add button.
- Click the Everyone option from the usernames and then the Read/Write option in the new window.
- When you’re done, click the Share button and then Done.
Next, go to your PC’s File History tool and add the new network drive. Here’s how it’s done:
- In the Windows search bar, type Control Panel and select the Best match.
- Select Small icons from the View by drop-down menu.
- Then, from the Control Panel, select File History.
- Click the Select drive option in the next box.
- Select the File History Drive folder in the network drive by clicking Add network location.
Method #7: Check and fix hard drive errors
If you suspect that there are mistakes on your hard disc, you should first check for defective sectors.
- In Windows 11 and Windows 10, right-click the Start button and select Command Prompt (Admin). In Windows 8/8.1, press Windows + R, type “CMD” in the Run window, and then hit Enter.
- Type chkdsk.exe /f H: into the Command Prompt window and hit Enter. Replace the letter “H” with the drive letter of your backup disc.
- It will take some time to complete the hard drive error check and repair.
- If the value of the bad sector is not 0, the disc is most likely damaged or prone to failure. To ensure the security of your backup data, clone the failed hard disc to a new one and use the copied one as the backup drive.
- If there are no bad sectors, the issue is not with the backup disc. This problem could be caused by configuration files.
Conclusion
When it comes to backing up important Windows data, you can always rely on the File History utility. If this tool causes you problems, use one of the solutions we’ve offered. If File History is still giving you trouble, you should look at Windows’ other file recovery capabilities.